Mailchimp allows you to simultaneously send bulk emails to multiple contacts. It allows you to create a regular email with the help of a checklist-style email builder. The process involves everything from adding recipients to designing your email content.
If you have created your account on Mailchimp, Clear Imaging would like to share the following information on how to send an email to your customers using this platform.
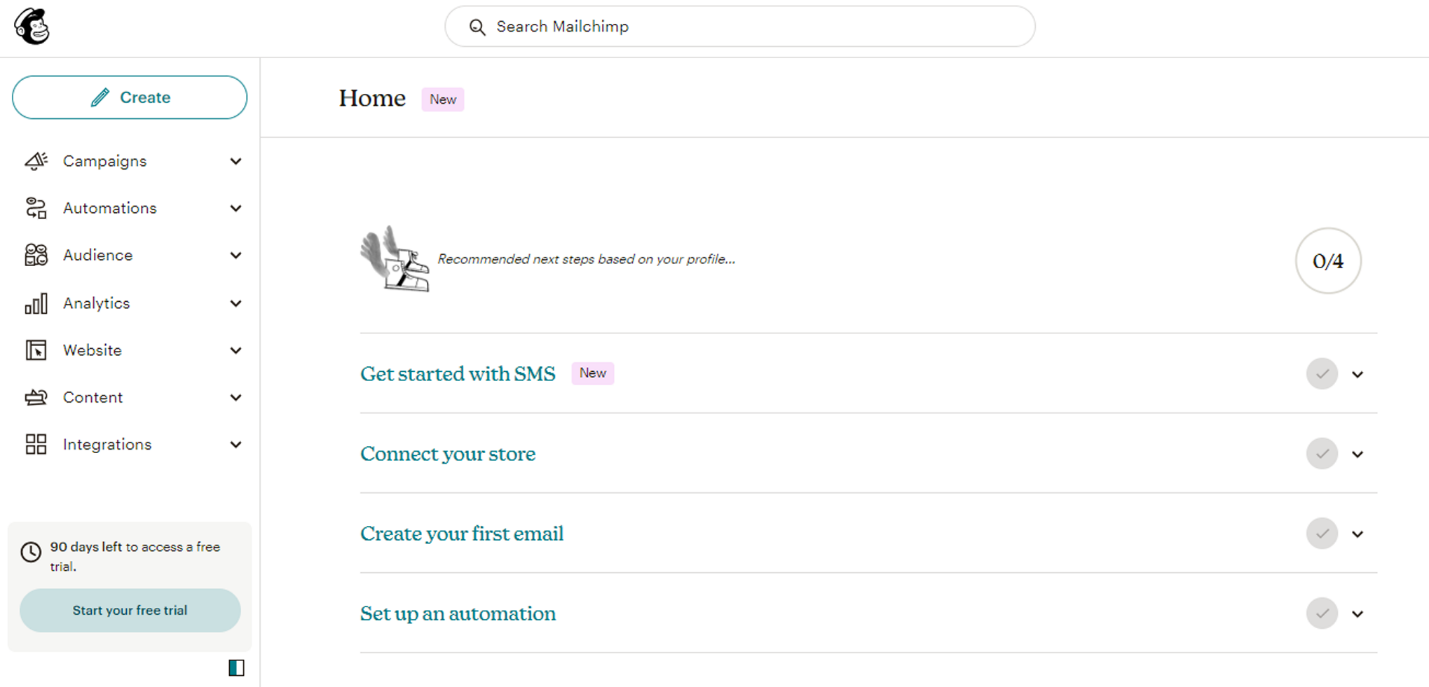
- Go to the dashboard

- Click on ‘create your first email’ and then on ‘create email’
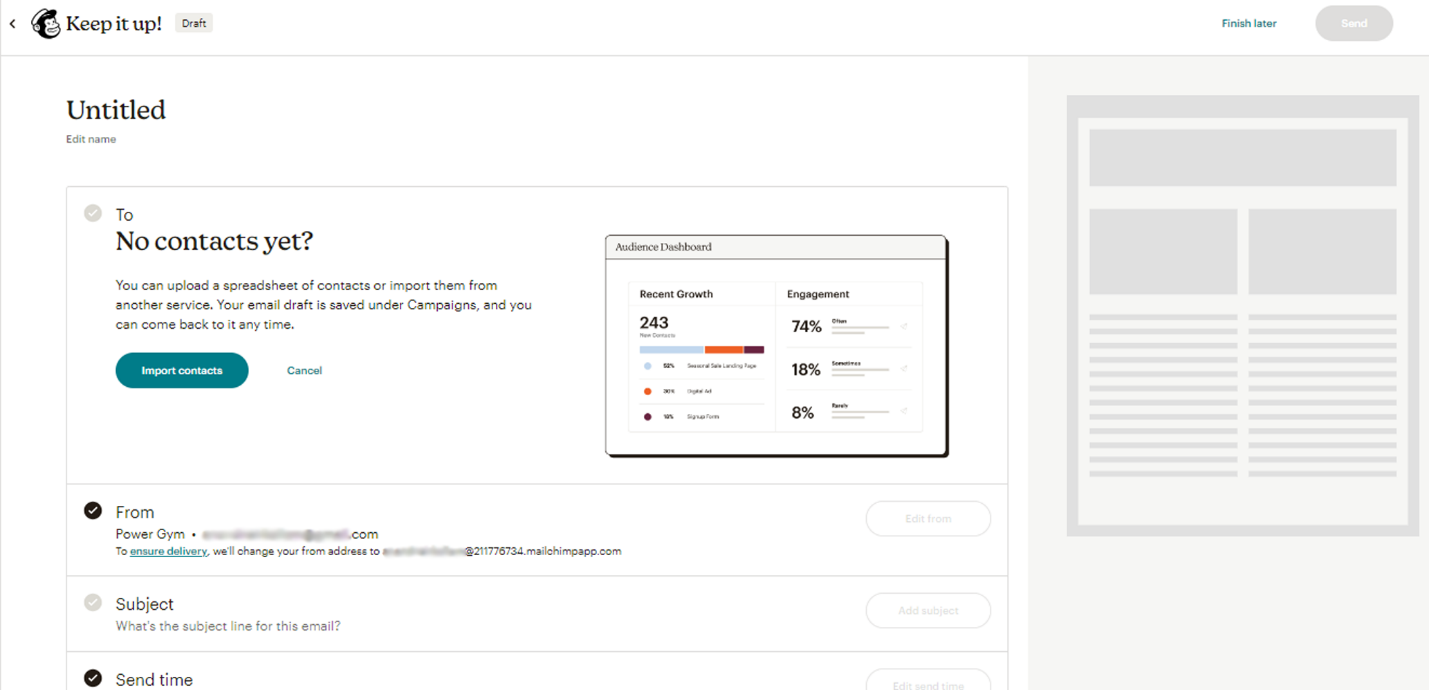
- Click on ‘add recipients’ in the ‘to’ section
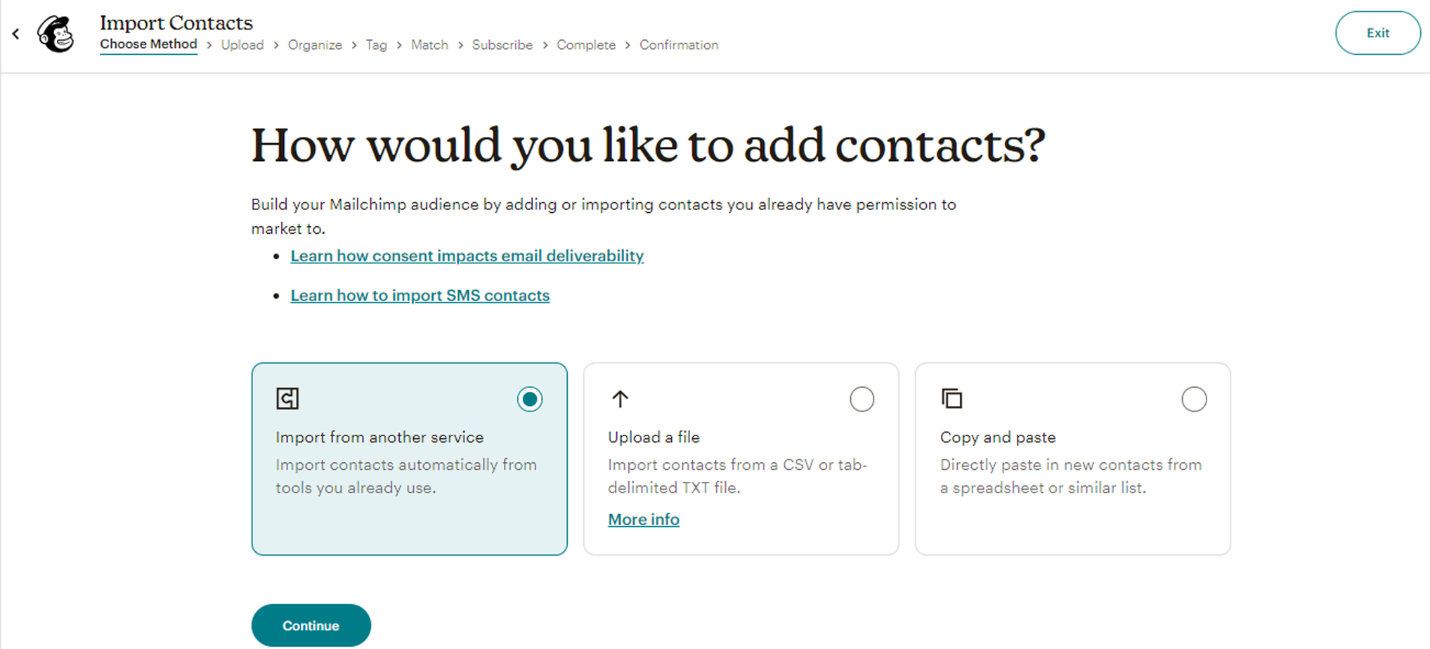
- From the next page, choose how you want to add contacts
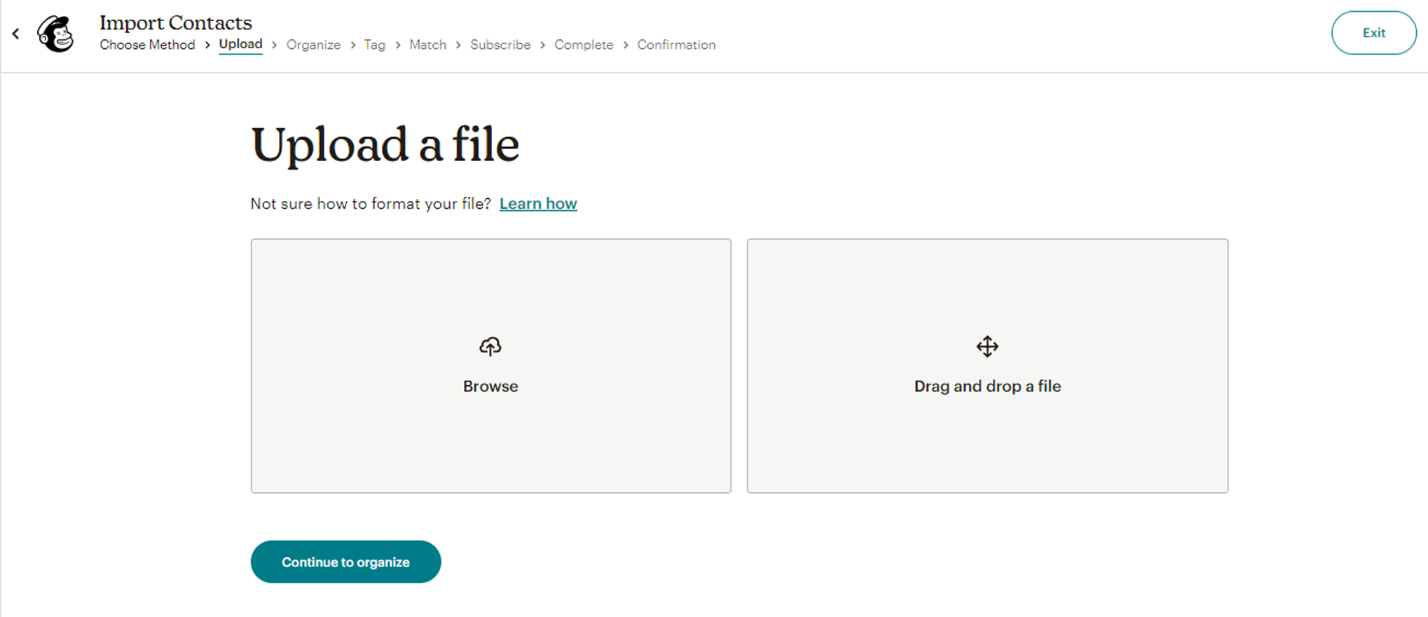
- If you have a file of email contacts, browse and select it and click on ‘continue to organize’
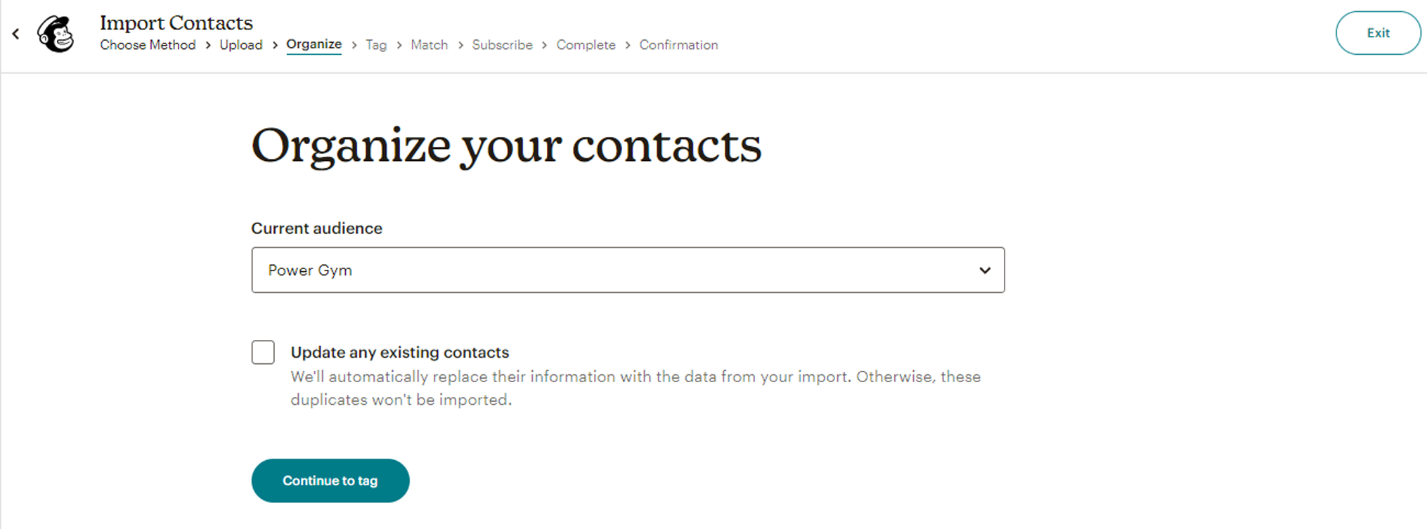
- Click on ‘continue to tag’
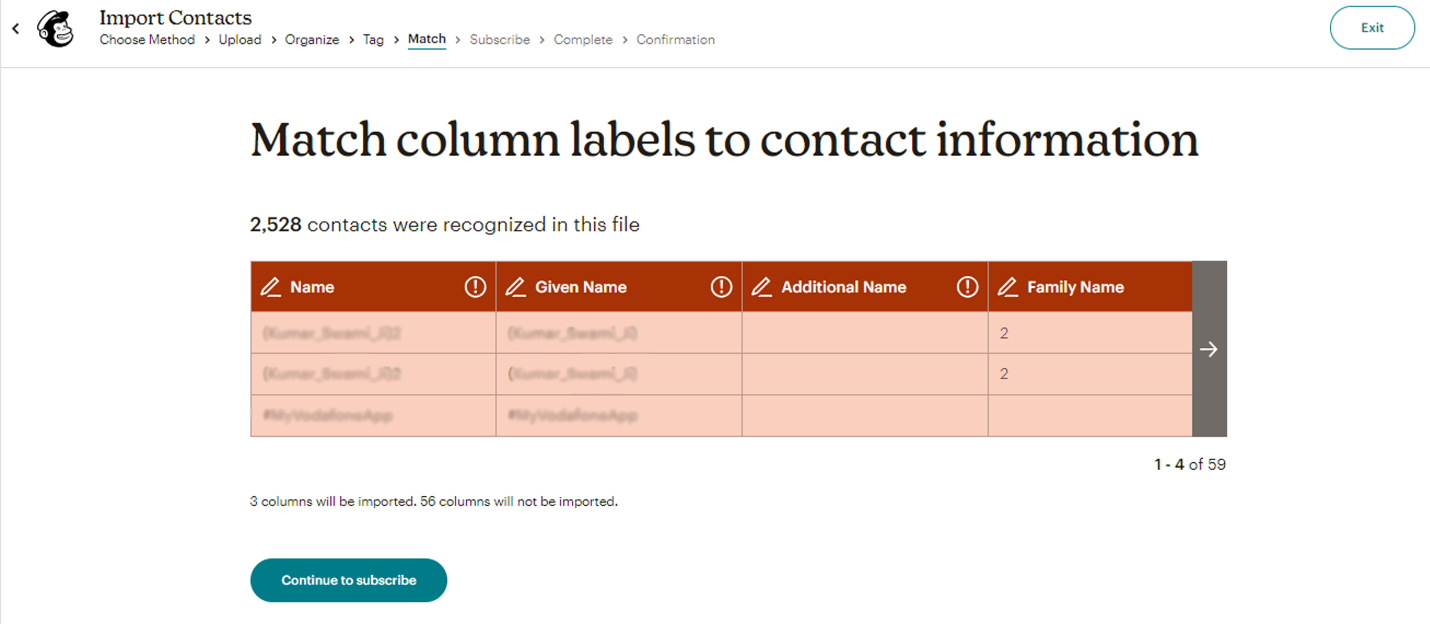
- Follow through on all the steps
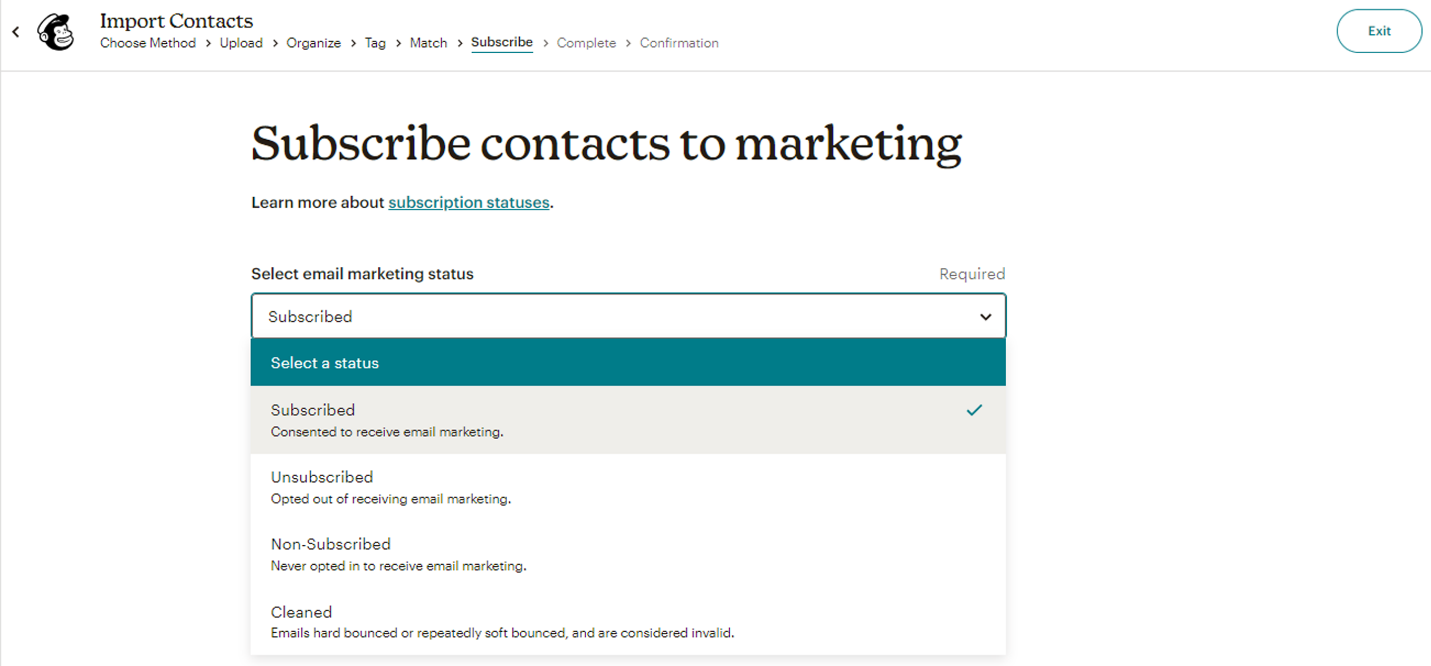
- Select the email marketing status and then click on ‘finalize import’
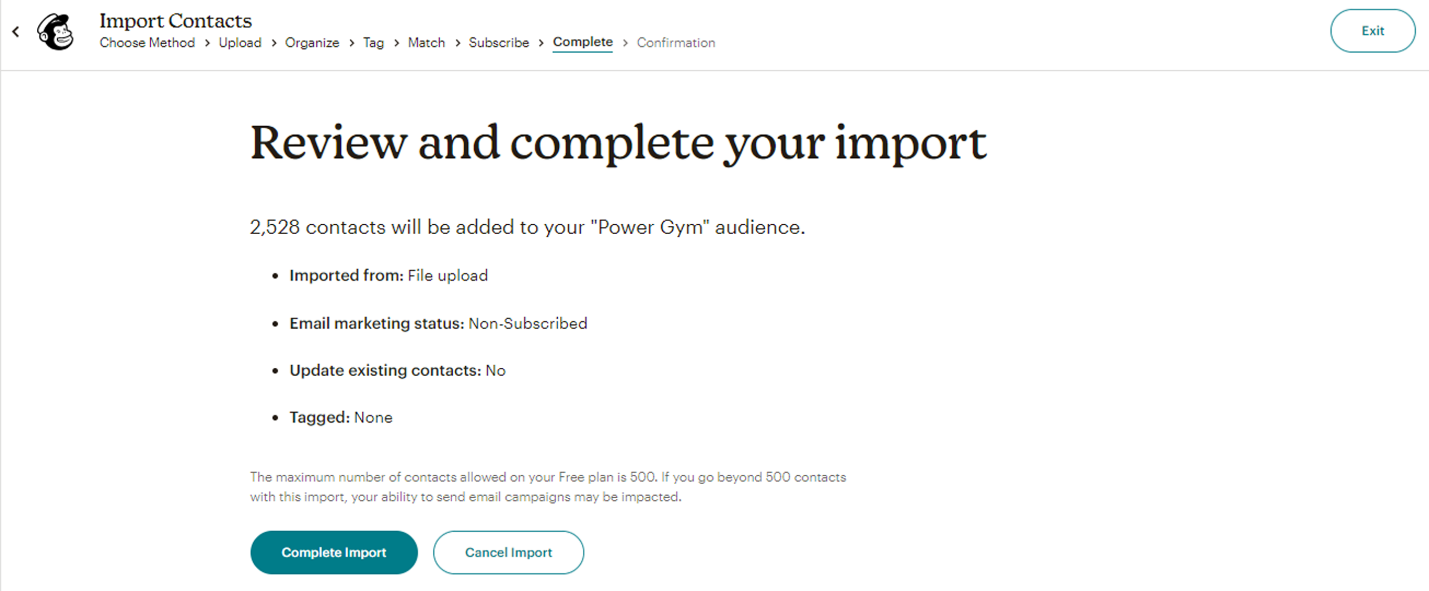
- Next, review the information before clicking on ‘complete import’
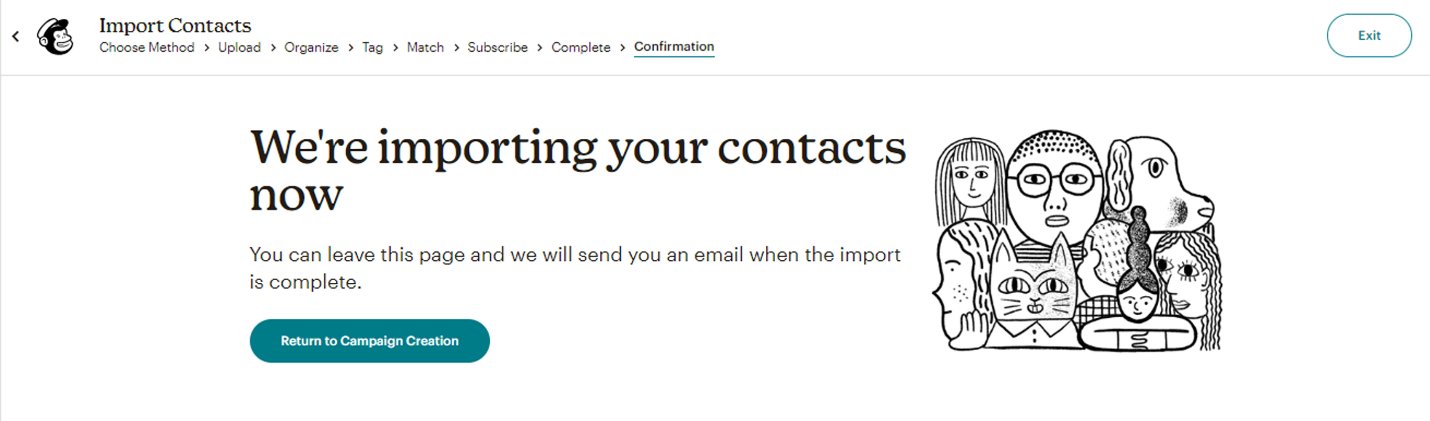
- Click on ‘return to campaign creation’
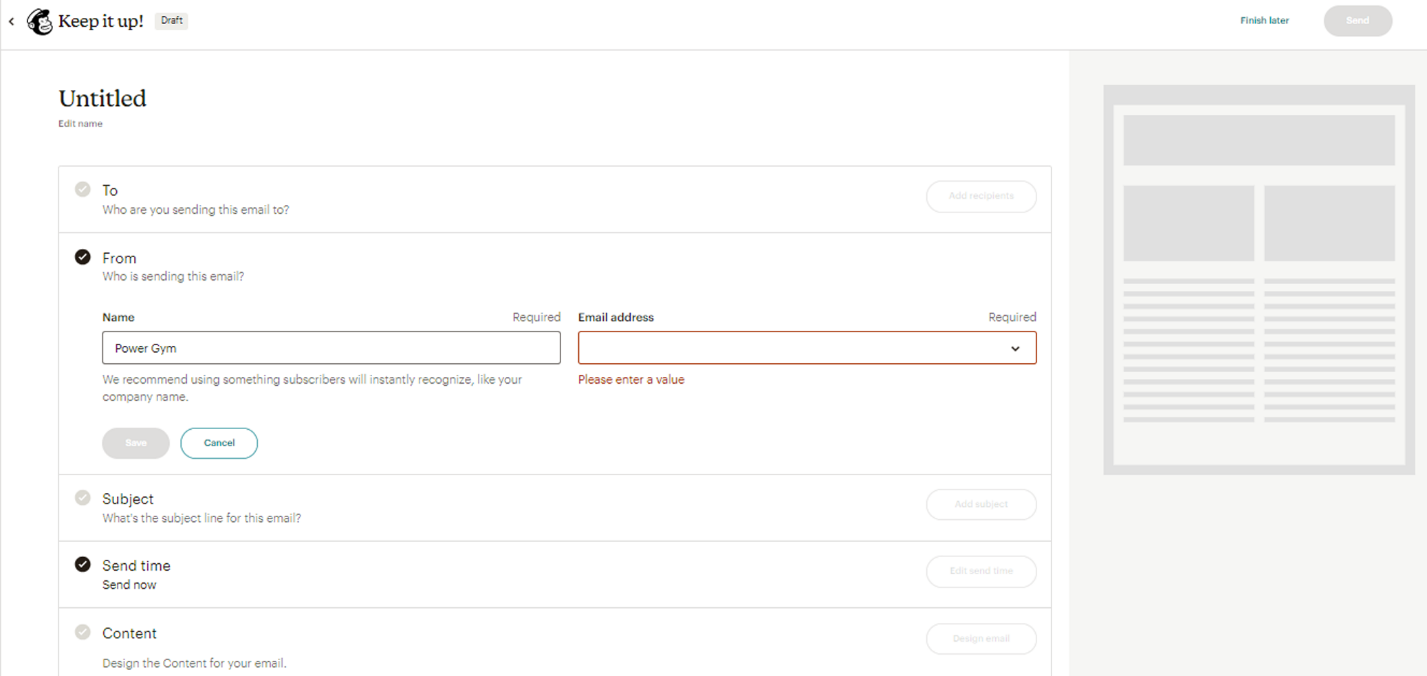
- In the ‘from’ section, enter your ‘name’ and ‘email address’ and click on ‘save’
- Click on ‘add subject’ in the ‘subject’ section
- Enter the ‘subject’ of your email and click on ‘save’

- Click on ‘edit send time’ in the ‘send time’ section
- Choose between the options ‘schedule a time’ and ‘send now’ depending on your preferences
- Click on ‘save’

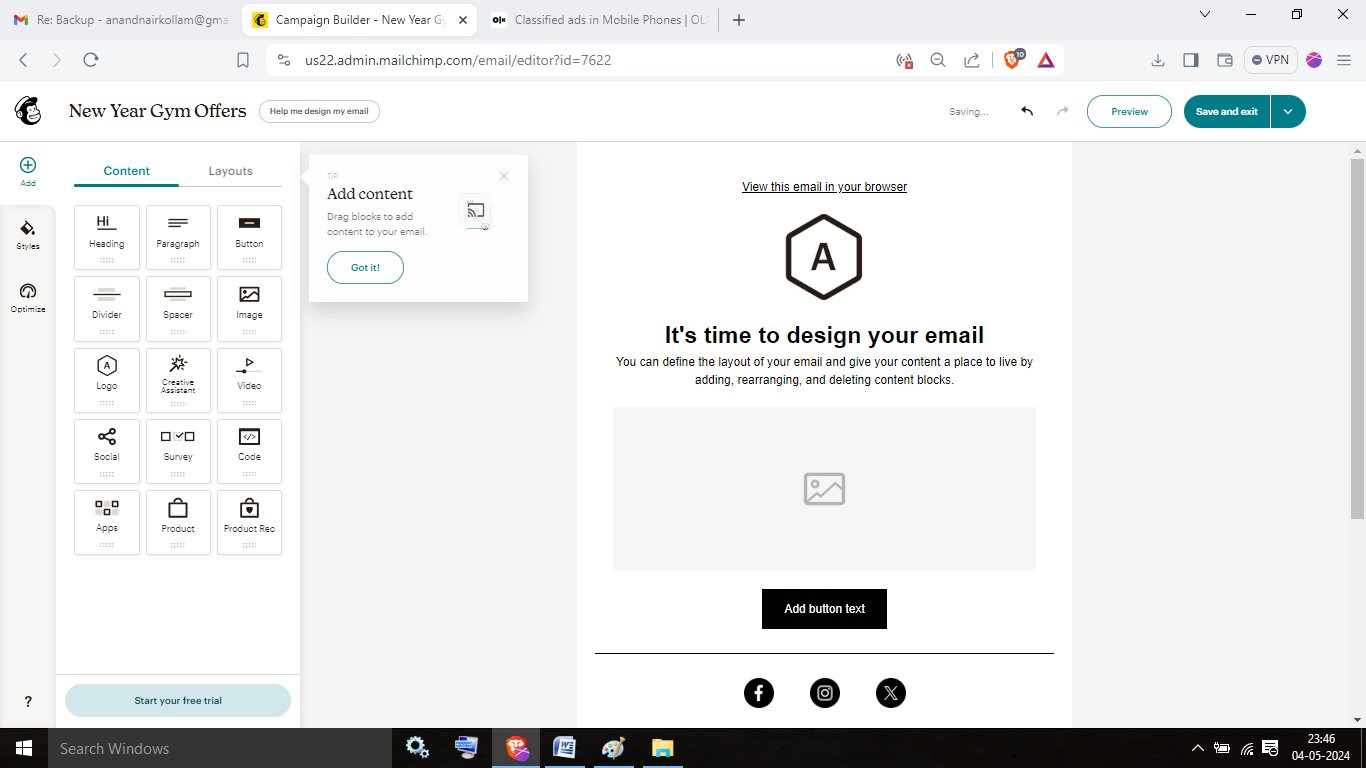
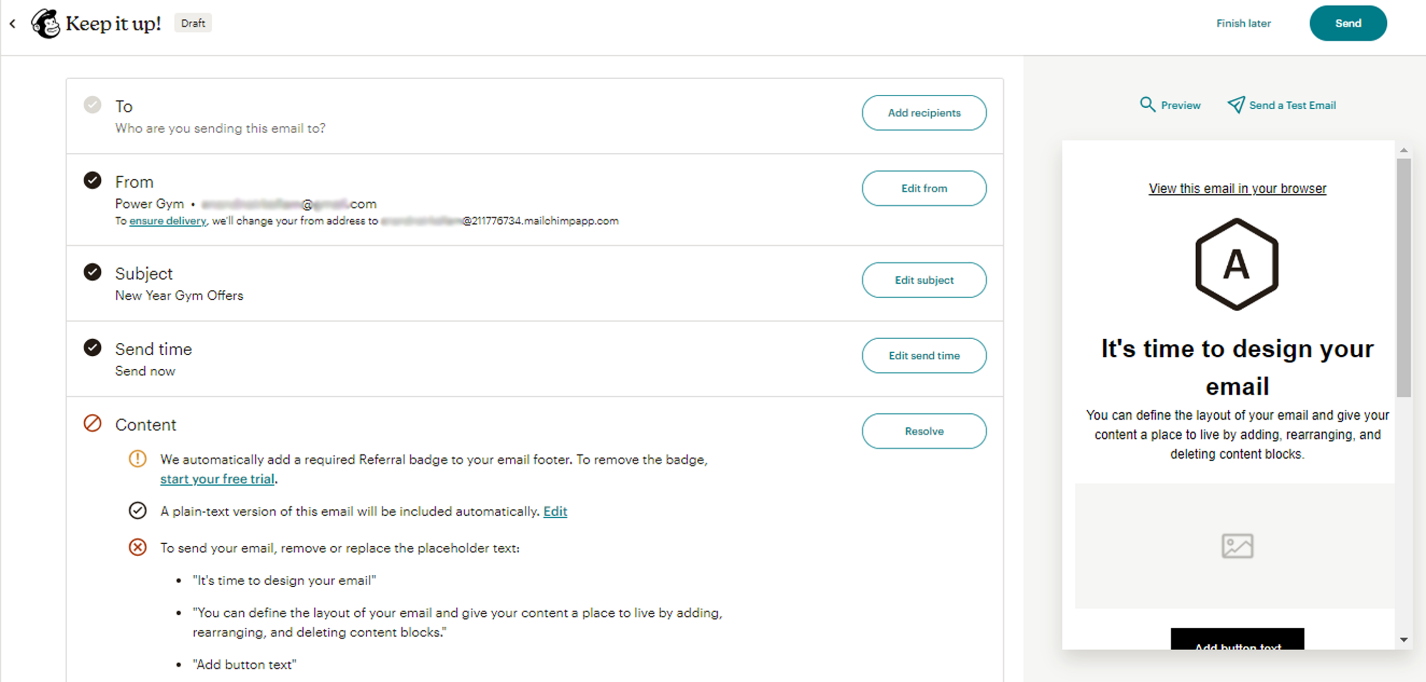
- Next click on ‘resolve’ from the ‘content’ section
- Once you have completed your email design, click on ‘save and exit’
- Preview your email on Desktop, Mobile, and Inbox
Now that you have developed your first email campaign on Mailchimp, you can click on ‘send’ to reach out to your targeted audience.
Designing Your Email
This step may seem like the tricky part. The default setting takes you to the new email builder. It allows you to add and edit the email content with direct inputs to the layout. It supports your marketing goals through tools such as Creative Assistant and Apps content block.
The classic builder, as the name suggests, is the traditional Mailchimp email content builder. It is still available for users. Go to the Account Details section to set the default email builder.
Points to Consider
Before you send out your email, it is recommended to follow these tips:
- Check the Audience: From the ‘to’ section in the email builder, check the recipients. Make sure you are sending the email to the right people.
- Check the Email Setup: Check the subject line, social share settings, email content, and tracking options.
- Re-Check Your Content: Go to the ‘content’ section and click on ‘edit design’. Re-check your email content before you click the ‘send’ button.
- Look for Broken Links: Make sure all the links in your email are working and direct to the correct URLs. In the new email builder, Mailchimp will automatically mark any broken links. In the classic email builder, you can seek the help of Link Checker to look for broken links.
Once you have checked your email content and settings, you are ready to click on the ‘send’ button.
For more information, guidance, and assistance, feel free to contact Clear Imaging. You can talk to us at 1(800) 380-6942 or send us a message using this Online Form.