Drip campaigns can generate 18 times more revenue compared to campaign-blast emails. This can help drive higher sales. Mailchimp offers a wide range of pre-built drip campaigns. All you have to do is choose the one that is right for you. It also allows you to use an existing HTML template or create one for design.
If you want to create an email drip campaign in MailChimp, this guide is for you.
Benefits of Creating a Drip Campaign
There are many reasons for creating drip campaigns. These include:
- Better Conversions
Brands running email drip campaigns drive 80% more sales at a third of the cost of other forms of marketing. It helps you run highly targeted and relevant drip emails that draw your audience to your brand. This further helps in increasing repeat business.
- Time Savings
Time and resource saving is another reason for setting up drip campaigns. Since these email campaigns run automatically, they help free up your time so that you can focus on other important tasks.
- Re-Engaging Customers
Drip email campaigns are ideal for your business if you want to re-engage your customers. These are customers who have already demonstrated interest without placing an order. This also includes prospects that abandoned their shopping carts.
- Benefit from High Engagement Rates
Since drip campaigns are delivered in a timely manner and are personalized, they are highly likely to grab the audience’s attention. These emails have very high open and CTR rates.
Besides, these campaigns are perfect for nurturing leads. They also help build trust over time by providing key insights and data.
Setting Up Your Mailchimp Drip Campaign
It is recommended to take the following steps to create your email drip campaign in Mailchimp:
Choose the Right Drip Campaign Option
- Sign up for an account and log in
- Locate the drip campaign option from the automation tools menu
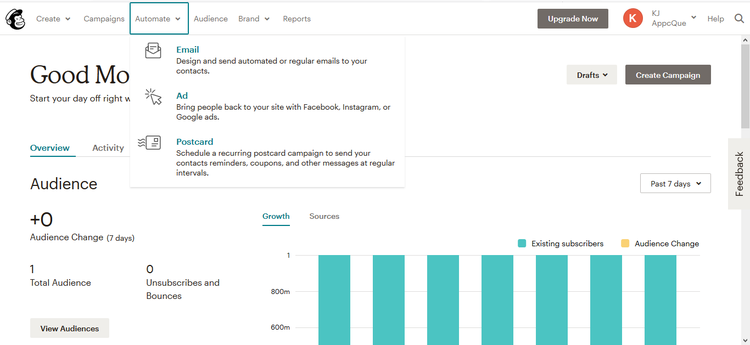
- Click on ‘automate option’
- Choose the option ‘email’
Answer all the questions specifying your goal. It can be to sell products on your ecommerce store or to encourage customers to book appointments on your website.
Select Automation Email Type
The platform offers many templates. Each one serves a unique purpose. Some of the examples include:
- Creating welcome emails for those who sign up first for your list
- Creating date-based emails to be delivered on a customer’s birthday or anniversary
An interesting thing about Mailchimp is that it offers information on each template. This makes it easier for you to choose the right template based on the purpose.
It is important to select the right type of automation email. Besides using a Mailchimp template, you can create a unique custom drip campaign. You can determine what information you want to send out to your customers and at what time. The platform also allows you to create a custom workflow.

It is recommended to provide easy-to-remember names to your campaigns.
Set Up Email Criteria
Once the automated email campaign has been created, you must set up your email criteria.
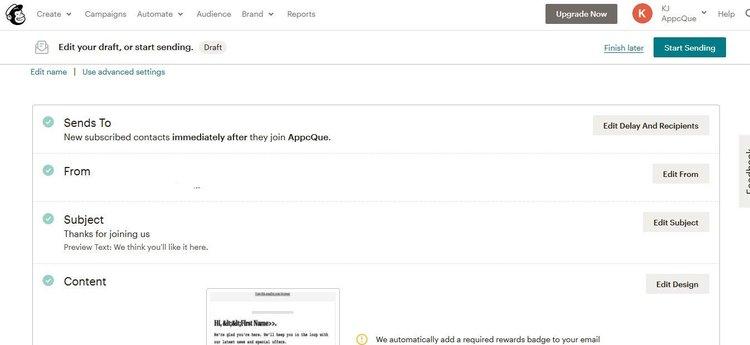
Examples of such criteria include:
- Adjusting the to and from addresses
- Adjusting the subject lines
- Mailchimp also allows you to customize the criteria for its behaviorally triggered emails
Personalizing the subject line can help boost the open rate. Make sure to verify your domain and avoid using a free email client.
Content Creation
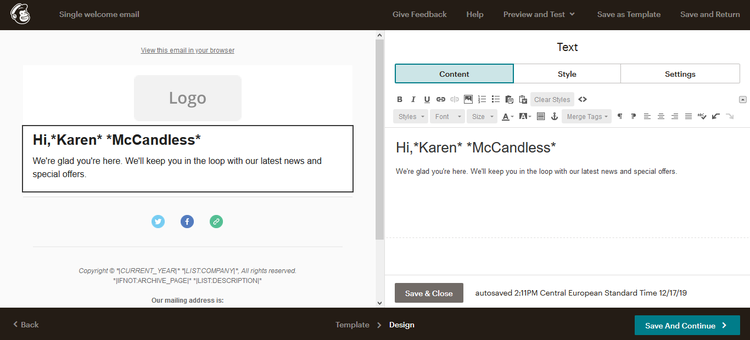
The next step is to create the content for your emails.
- Use Mailchimp’s email editor
- Create a custom email for each campaign by adding text, images, social sharing buttons, and videos
- Customize the style by adjusting the font size, color, and position to complement your brand
- Use the preview mode to check how your email will appear on different devices
- Use the Mailchimp link check to detect any broken links
Add More Emails
Edit the drip campaign if you want to add more emails and set up a sequence.
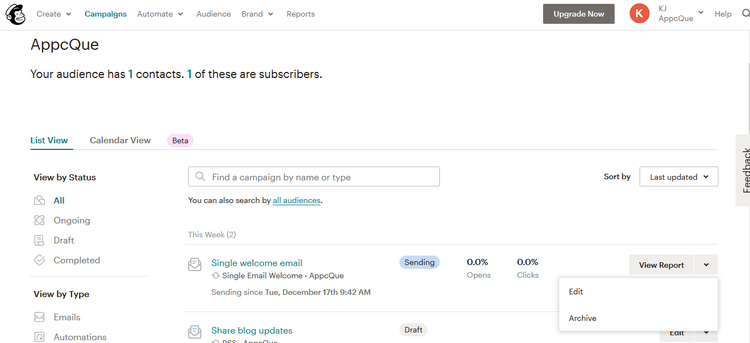
- Go to main navigation
- Click on Campaigns
- Choose the edit option
Follow the same steps from above to set up the criteria and email design attributes. Preview your email.
- Set your email’s status to ‘sending’ from the Campaigns dashboard
- Pause the campaign to make additional changes
- You can then send your drip campaign to a specific segment or make changes to the days the emails will be sent
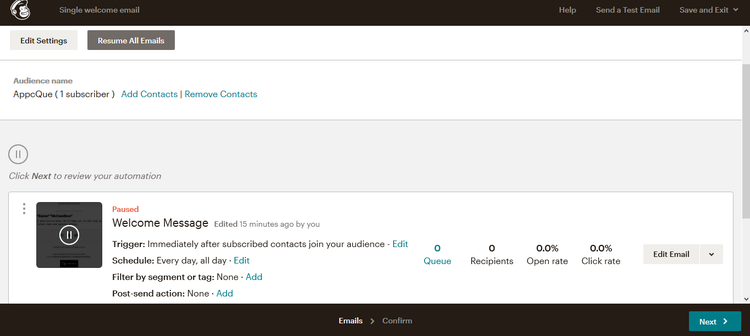
- Go to the main dashboard and adjust the status between ‘sending’ and ‘paused’
Tips for Creating Your Email Drip Campaign
Follow these tips to get the most out of your email drip campaign:
Segment Your Audience
You may have a long subscription list. Each member on your list has a different reason for subscribing. They are also likely to be at different points in the sales journey. So, you should make different drip campaigns for different members on your list. This requires segmenting your list and placing subscribers in different categories. So, you must create multiple, smaller campaigns. This can help you address each category’s unique needs, thus boosting conversion and retention rates.
Create Date-Wise Drip Campaigns
Set up date-wise campaign automations. This can help you reach subscribers that are special to them. This can include sending out emails:
- On the anniversary of purchasing a product
- To inform them when their subscription needs to be renewed
Test the Frequency
It is important to set the right frequency to increase your drip campaigns’ ROI. Consider the following factors when setting up the ideal frequency:
- The segment being targeted
- The subscriber’s position in the sales funnel
- The email content
If you want to find the perfect frequency, it will take some experimentation. As a general rule, follow the click-through rates (CTR) to determine what email frequency works best.
- A CTR in the 2% and 5% range can mean a good frequency
- A CTR lower than 2% may mean that the frequency is high or low
A low click-through rate can sometimes mean that your content needs improvement.
So, it is recommended to follow these steps and tips when creating your Mailchimp email drip campaign.
If you want to create successful drip campaigns, it is recommended to contact Clear Imaging. You may reach out to us at 1(800) 380-6942 or send us a message.